Web Development for Artists: 2

Previous: Web Development for Artists: 1
Next: Web Development for Artists: 3
Hello again, dear student! Welcome back. I missed you.
In our last installment, I rambled through a sort of course introduction and then described the steps to take in order to launch your new independent website. If all went well, you have an account on Neocities that now hosts your placeholder website. You should have your Neocities dashboard open now.
Today, here, now, we are going to learn how to modify the content of your website. I think I'll try to follow a do -> explain approach to teaching here.
Like all websites, your website has an address. By default, the address for your website on Neocities is the username you chose followed by the Neocities domain. In a future installment of this series, we'll learn how you can customize this address.
In a new tab, navigate to your new website's address so you can see what the live version looks like. Be sure to keep the Neocities dashboard open in its own tab.
This feels like a good opportunity to mention that it will help if you are easily able to manage multiple browser tabs, windows, and screens. If your computer only has one screen, it is fine. You can read these instructions and other documentation from your phone. I will attempt to describe the optimal multi-tasking workspace layouts as we go along.
At this point, you should have your browser open with two tabs on your main screen. One tab is the Neocities dashboard, the other tab is your website. You should be reading these instructions on a side screen or phone.
Take a look at your new website! You'll see something like this:
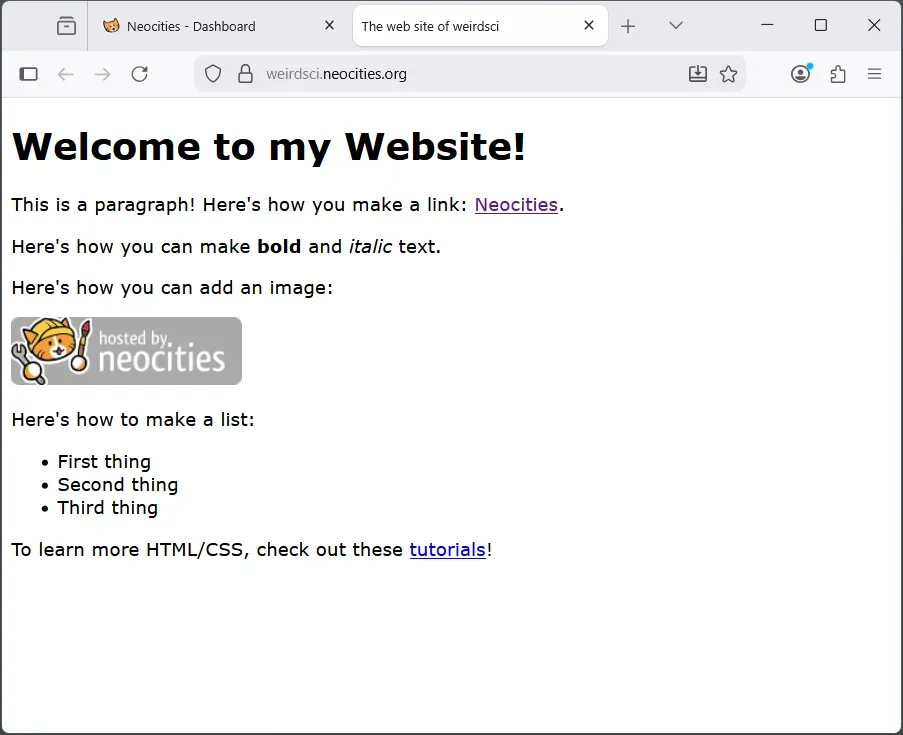
Just like any website, you can interact with the content and view it from any device with a web browser. However, you may have noticed, that there isn't a button or clear way to edit the content from here. Don't fear! In fact, that's what the Neocities Dashboard is for. Let's proceed to learn how to use it to modify the content of your website.
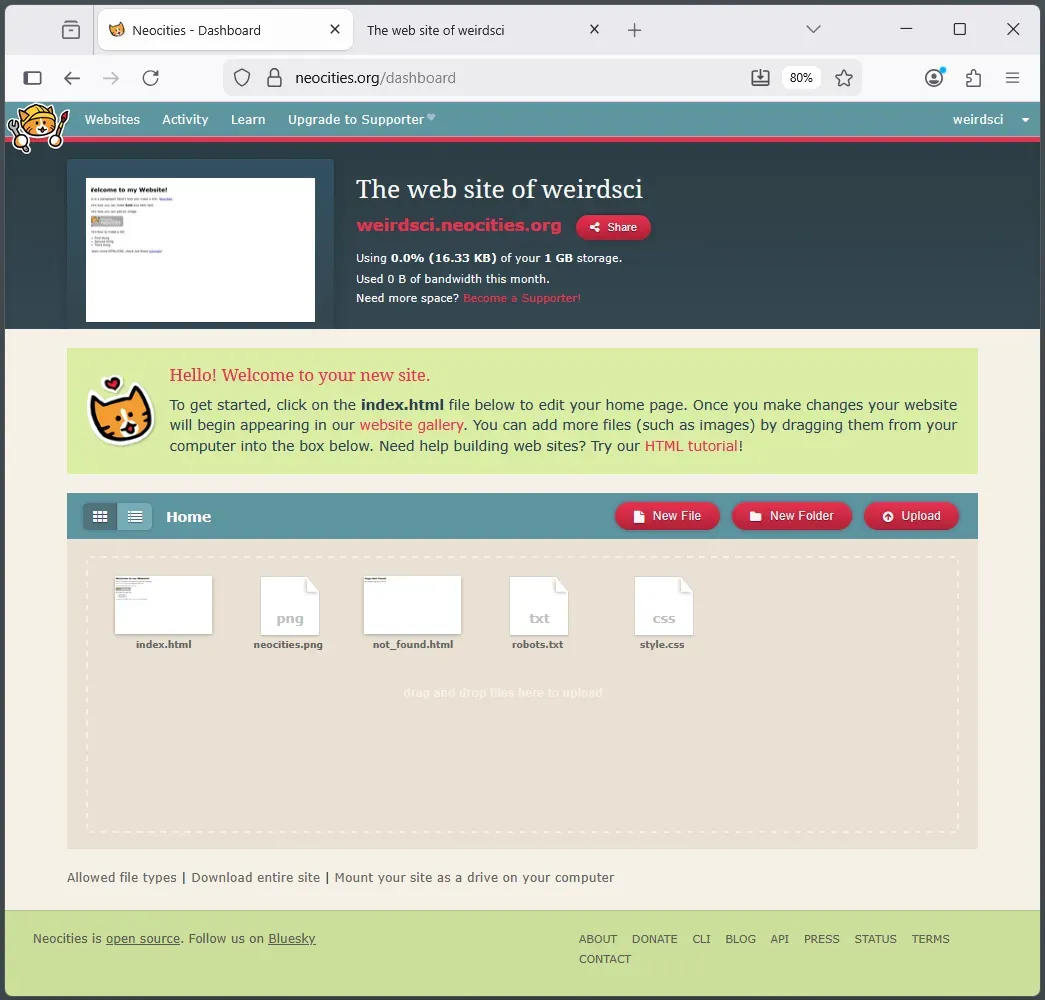
Now you should be looking at the Neocities Dashboard.
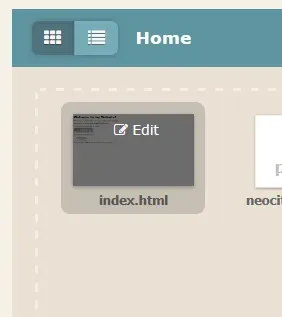
Hover your mouse cursor over the file with the title "index.html" and click the edit icon to edit it.
Now you should be looking at a page with HTML "code" displayed in a text editor. This code in the index.html file is what you will update in order to change the content of your website.
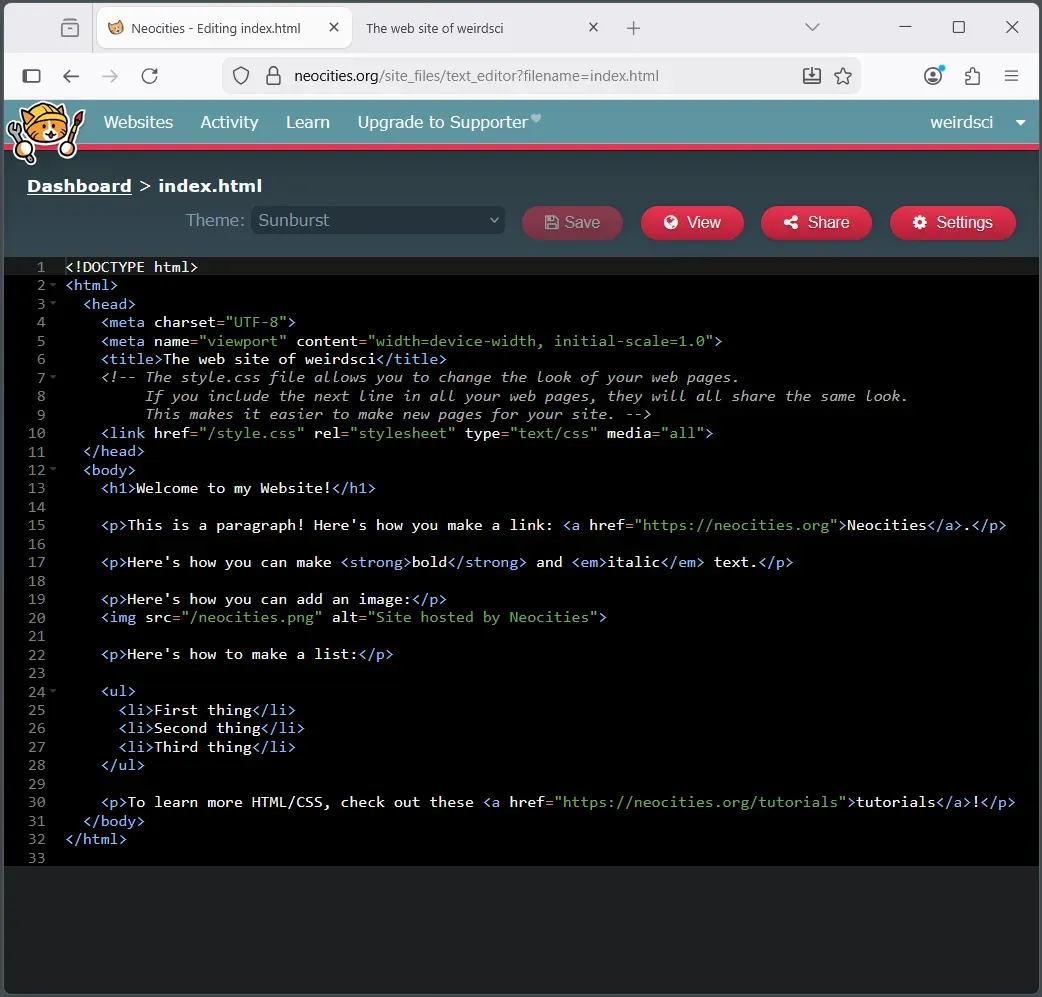
If you've never tried to read something like this, it may appear overwhelming at first glance. All you need to worry about right now are the parts that you can read– those parts that you already understand.
In essence, right now you are only paying attention to those parts that are also visible on the live website. Right now you are ignoring any unfamiliar or invisible parts that show through in the markup language code.
So let's get on to customizing this thing. Go ahead and remove or update only the English text (the text that is not pat of HTML code tags).
I'll describe how I changed mine in the following list. It uses the imperative voice, which is common for documenting changes to a codebase. You may end up making different decisions for yourself; feel free use this list as a general guide.
- Update title. Replace "The web site of" text with 🥽 emoji.
- Update main heading. Replace "Welcome to my Website!" with "🥽 WEIRDSCI WEB 🥽"
- Update first paragraph. Replace "This is a paragraph! Here's how you make a link: " text with "This website is hosted for free by: ".
- Update second paragraph. Remove the text "Here's how you can make". Replace the text "bold" with "Neocities". Replace the text "and" with "is a wonderful example of a ". Replace the text "italic" with "sustainable civic software service". Replace the text "text" with "and they deserve our support!"
- Update third paragraph. Replace "Here's how you can add an image:" with "Neocities badge:"
- Update the fourth paragraph. Replace "Here's how to make a list:" with "Coming soon:"
- Update all list items. Replace "First thing" with "art". Replace "Second thing" with "writing". Replace third thing with "more updates".
- Update final paragraph. Replace "To learn more HTML/CSS, check out these" with "I'm learning about HTML and CSS with the help of these"
Be sure to click the save icon in order to save your changes after each update.
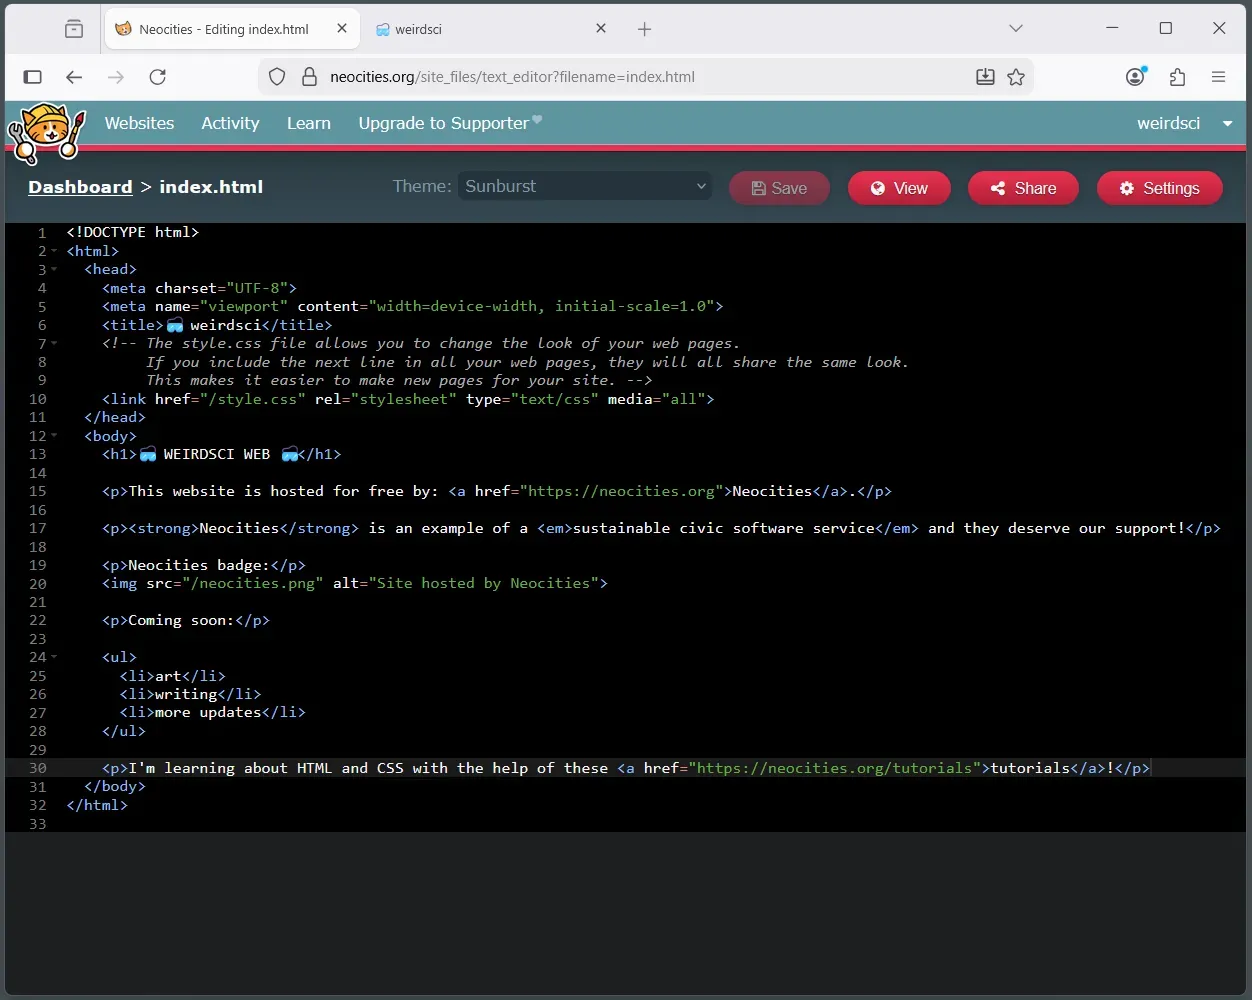
Here's what my updated index.html file looks like now:
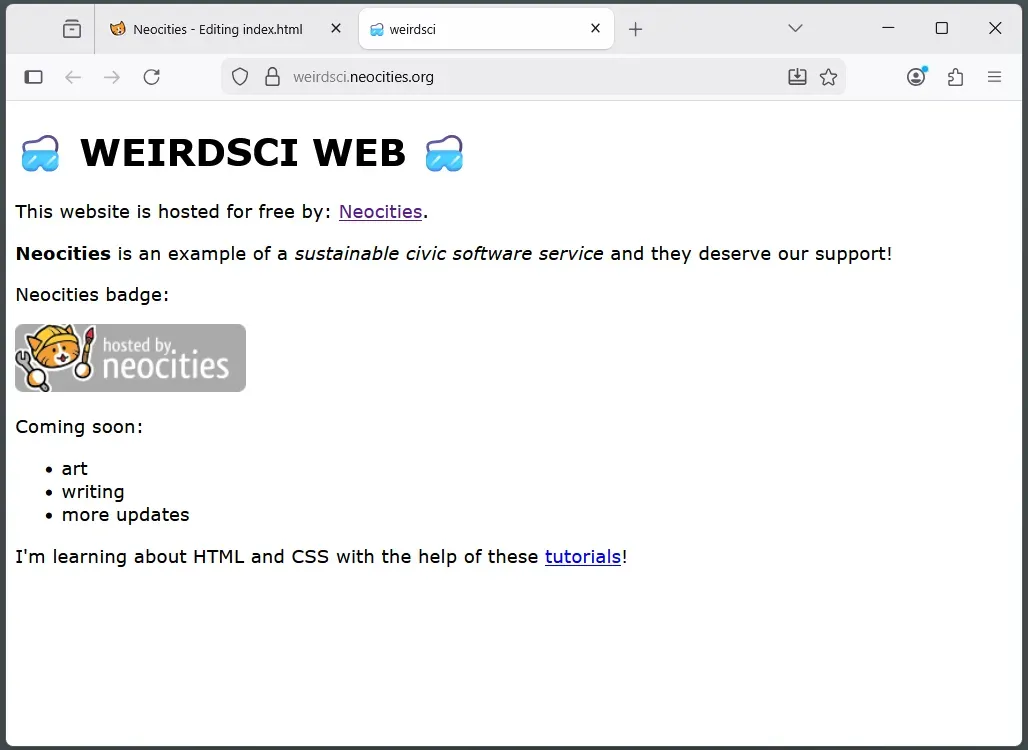
And here's what my updated website looks like now:
That's it for this lesson. If you have followed along and successfully customized your page, pat yourself on the back!
If you have questions or get stuck on something please don't hesitate to reach out to a human friend by posting down in the comments. We are all here for us! Thanks, us. It's our pleasure.
Thanks for coming in today. In our next segment, we should be learning how to add another page to your website.
<3 Grant
Next: Web Development for Artists: 3